How To Import Contacts (Upload File Version)
In this guide, you’ll learn how to set up your contact groups by uploading an xls spreadsheet.
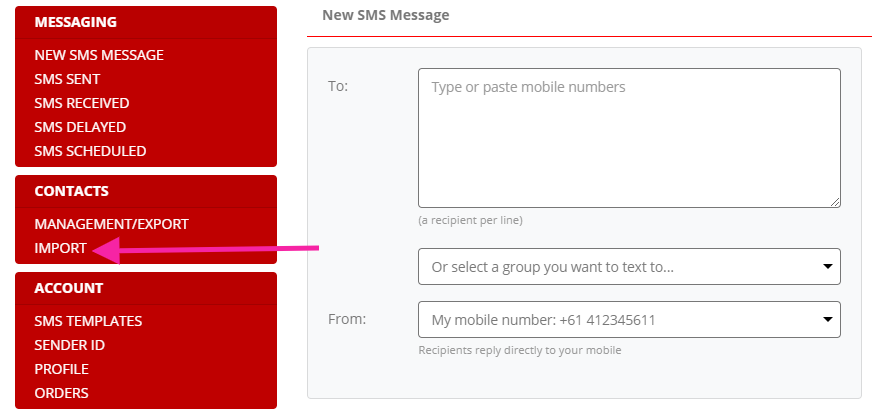
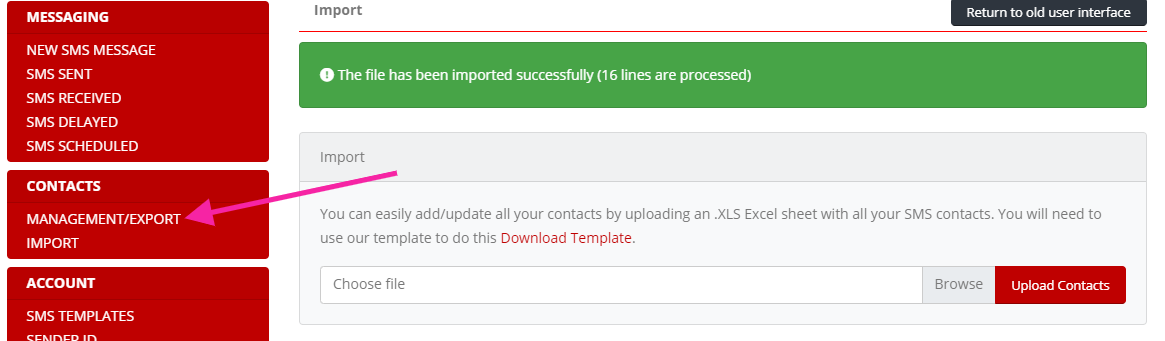
Step 1: Import Contacts
Click the “Import” button on the left-hand menu
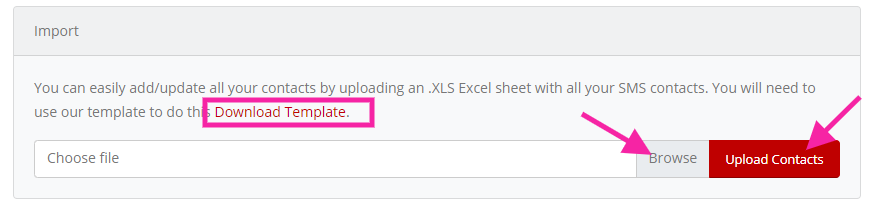
Step 2: Upload File
- Click the “Browse” button and search for your file
- Click the “Upload Contacts” button
If successful you should see a green bar at the top letting you know your contacts have been uploaded correctly.
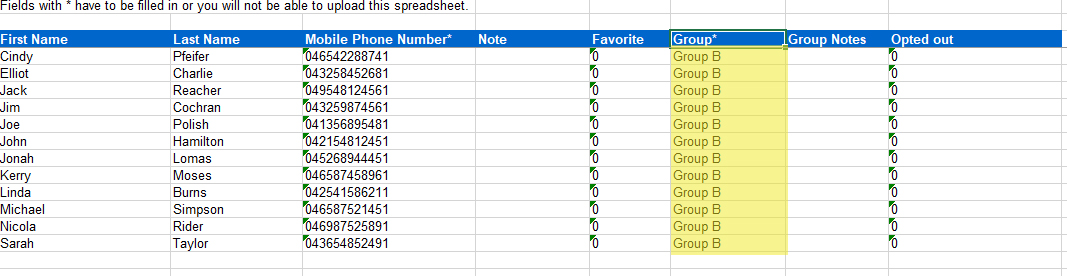
The best way to ensure a successful file upload is to ensure that your spreadsheet has at least:
- Mobile Number Column
- Groups Column – The group column tells our system which contacts group you wish to add that mobile number to (see below for an example of the groups column).
Note: Sometimes the bar will say that the upload was successful but there was an error on a specific line(s) (ex. error on line#4) just check your spreadsheet and make sure that the number is correct or that there is an entry on that line.
IMPORTANT
If the mobile numbers you are about to copy onto our spreadsheet begin with “0” (ex. 04 123 456 78) then it’s likely that zero will be removed leaving you with 4123 456 78 which will mean that our system will not be able to send text messages to those numbers. Mobile numbers should start with either: +61, 61 or 04.
Read our FAQ guide on how to ensure the leading “0” is not removed HERE.
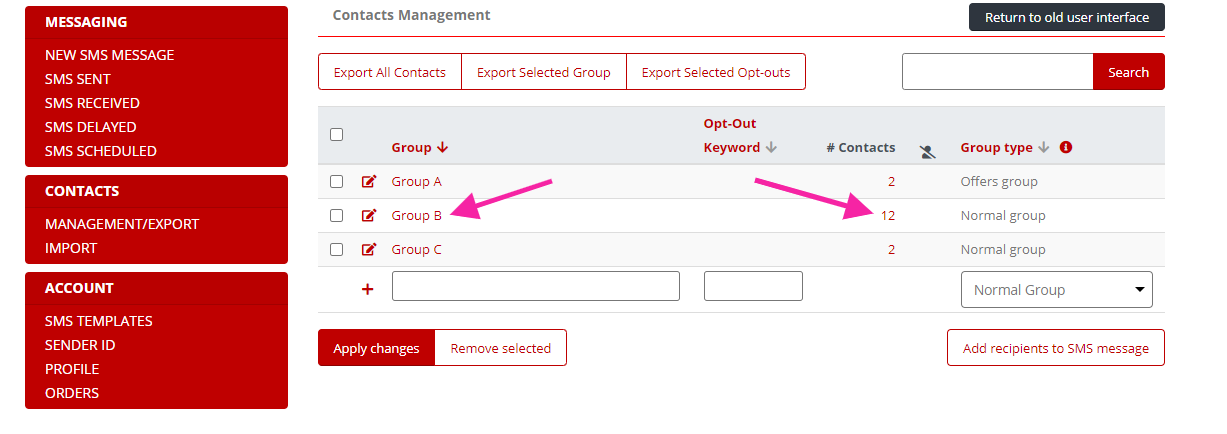
Step 3: Management/Export
Click the “Management/Export” button to go back to your contacts management interface.
Step 4: Check Contacts
Check your contacts and make sure everything is correct.