Main Interface Overview
Recently we updated the user interface for 160 with the goal of making it more functional.
In this guide, we’ll cover the new layout along with additional more in-depth guides on how to use the main features. Also, if you have any feedback regarding the new interface please let us know at sales@160.com.au.
We are especially interested in areas where it is taking you longer to complete a task perhaps because you are needing to go back and forwards through steps for example.
The Menu Section
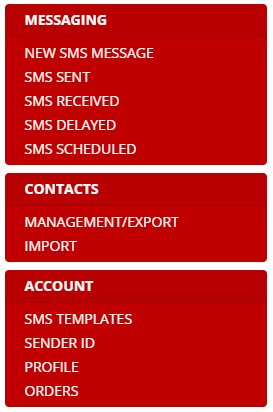
- New Message – this will take you back to the message composer
- SMS Sent – this will allow you to see all of the messages you’ve sent including date range search as well as export those messages.
- SMS Received – See all of the messages you have received. This will not show any replies if you are using your mobile number as the send option.
- SMS Delayed – See or cancel any of your scheduled messages.
- SMS Scheduled – see or cancel any of your periodic/recurring messages.
- Management/Export – Manage your existing contacts
- Import – Import new contacts
- SMS Template – Create/edit/delete your SMS templates
- Sender ID – set up your business name (up to 11 characters) so recipients see your business name instead of a mobile number. Note: recipients will NOT be able to reply – this is not recommended for promotional text messages as people will not be able to opt-out.
- Profile – update your account details
- Orders – see your order history
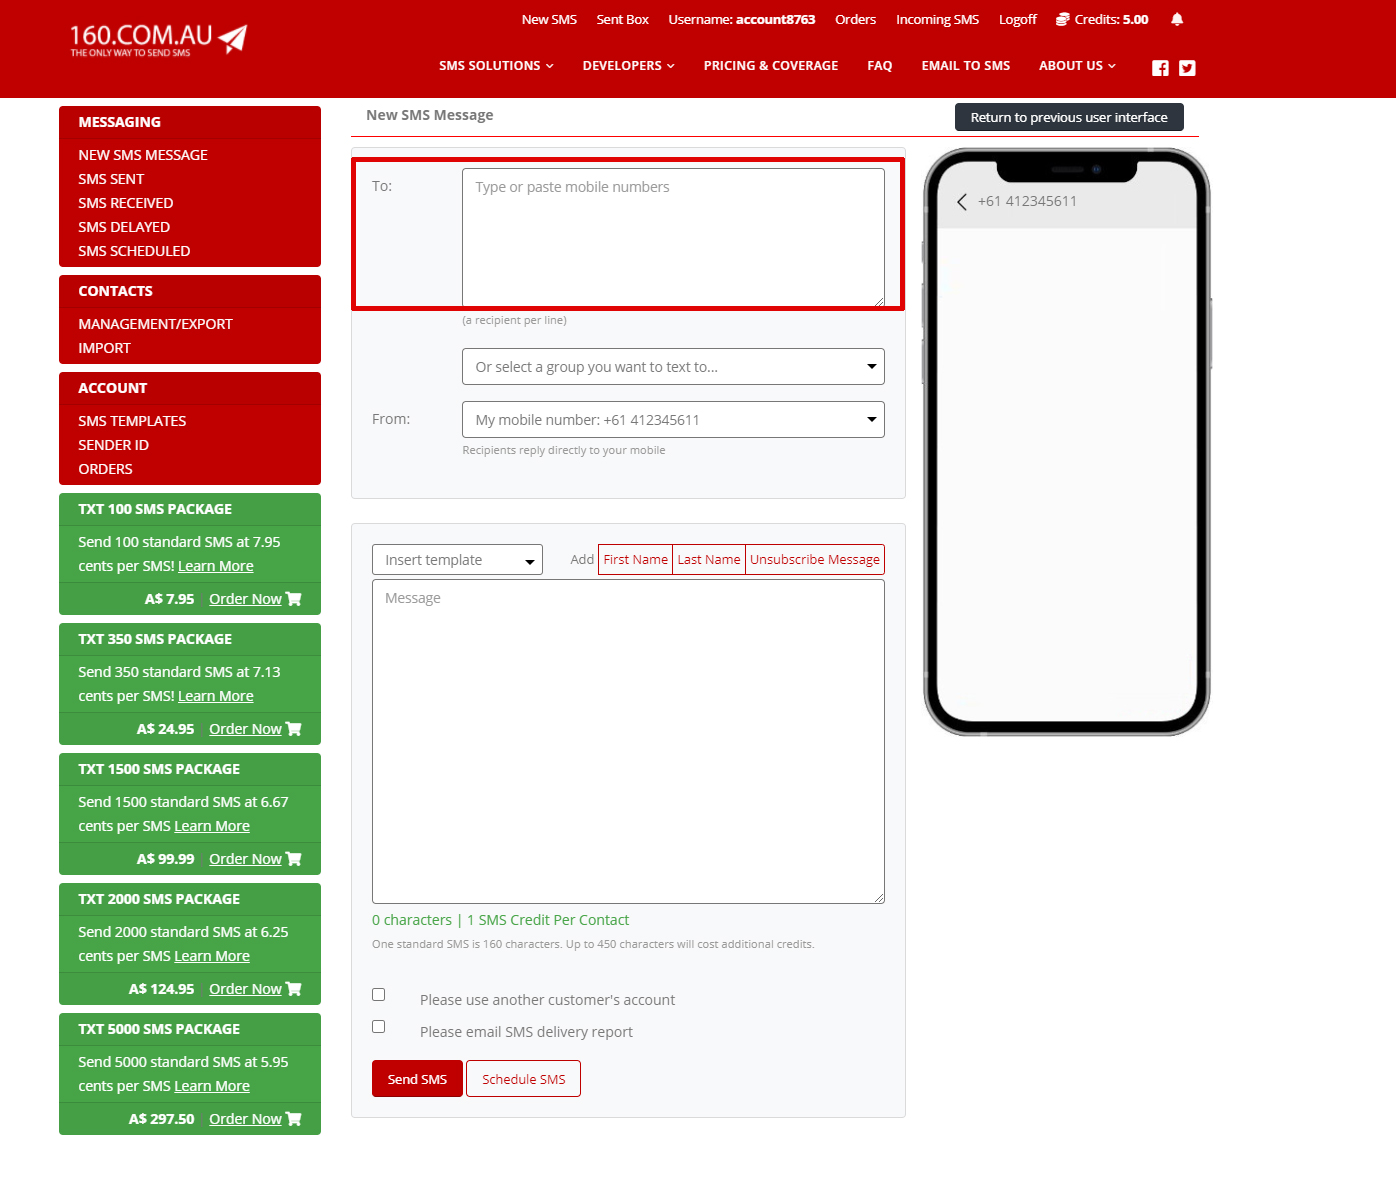
To: Section Part 1 (Type/Paste)
The “To:” section gives you two options:
- Add or paste the contacts directly into the box; or
- Use the drop-down menu to select the contact groups you have created.
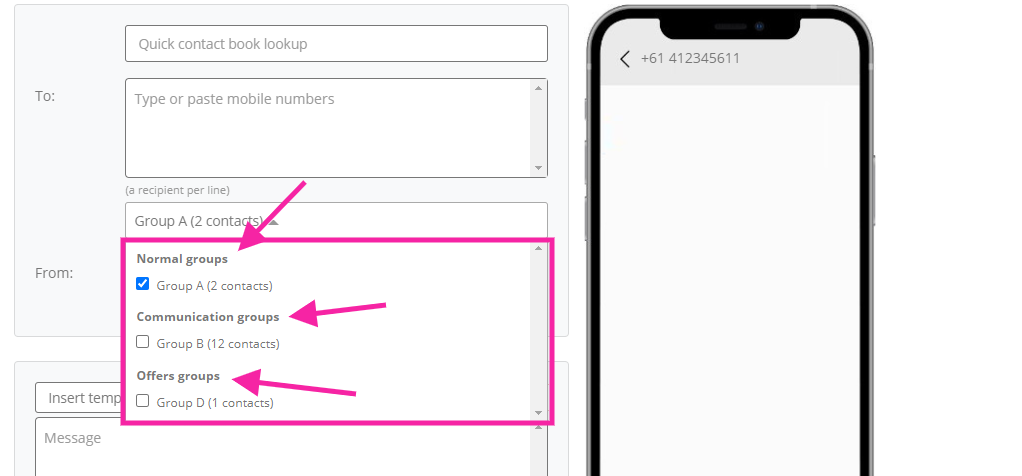
To: Section Part 2 (Selecting Contact Groups)
The “To:” section is made up of the ‘cut & paste’ and also a drop-down box below. This is where you can type or paste the mobile number you wish to text to.
If you have imported your contacts you can simply click the drop-down box and select the group you wish to send your text message to.
There are 3 basic types of groups available:
- Normal groups – this is mainly used for non-promotional text messages. These may be reminders or personal messages between friends or workmates.
- Communication groups – this is an SMS group chat where people can text one another and includes an auto-opt our feature.
- Offers groups – this is used for sending out marketing campaigns that require an opt-out option for people to unsubscribe from your platform.
Here you can select multiple groups but it is important to note that the opt-out feature will not work if you select ‘offer groups’ with other group types. If you want to use the opt-out feature then only use the offer group type.
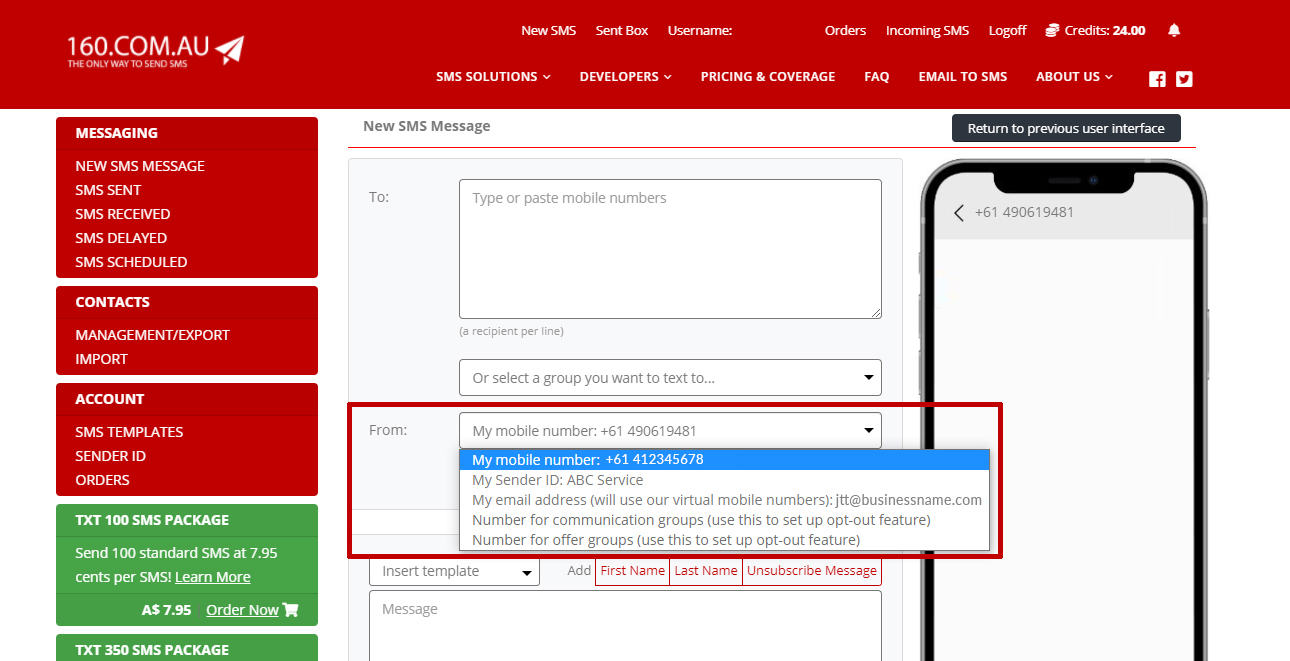
From: Section
The “From:” section allows you a few different options:
- My mobile number – This will allow you to send an SMS using your personal mobile number (any replies will be received on your mobile phone)
- My Sender ID – This allows you to use your business or brand name (up to 11 characters). You can set up your Sender ID by clicking on the “Sender ID” option on the left-hand side menu.
- My Email Address – this will use one of our Virtual Mobile Numbers to send your text message. Text message replies will come back to your email address (the email that is inside your user account, you can change this whenever you want.) NOTE: If you are having problems receiving replies on your email please make sure our domain name is whitelisted on your mail account/servers.
- Number for communication groups – this allows you to set up an SMS chat group where people can message each other as well as opt-out when they like.
- Number for offer groups – use this option when you want to send out SMS marketing campaigns. It also comes with an automated opt-out feature.
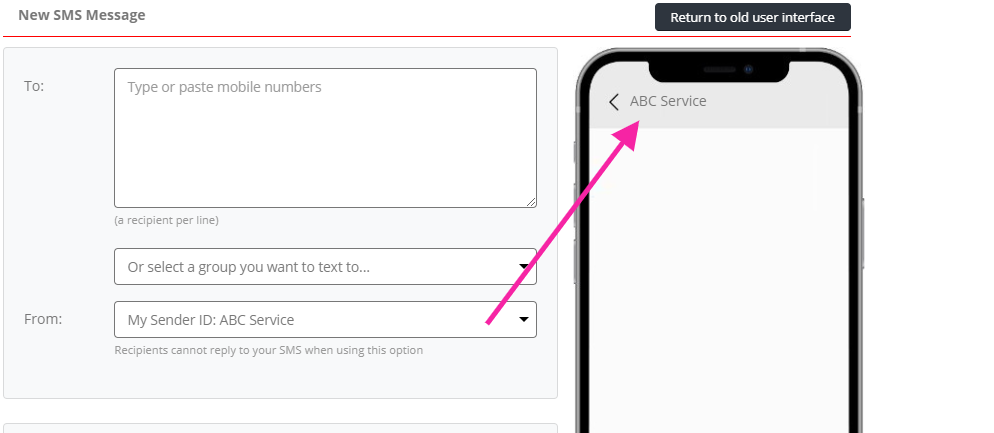
Mobile Phone Demo
The mobile phone on the right-hand side will show you what the recipient will see once they’ve received your text message.
In the following 3 examples you’ll see that the From section on the mobile phone will change based on which option you select from the drop-down menu box:

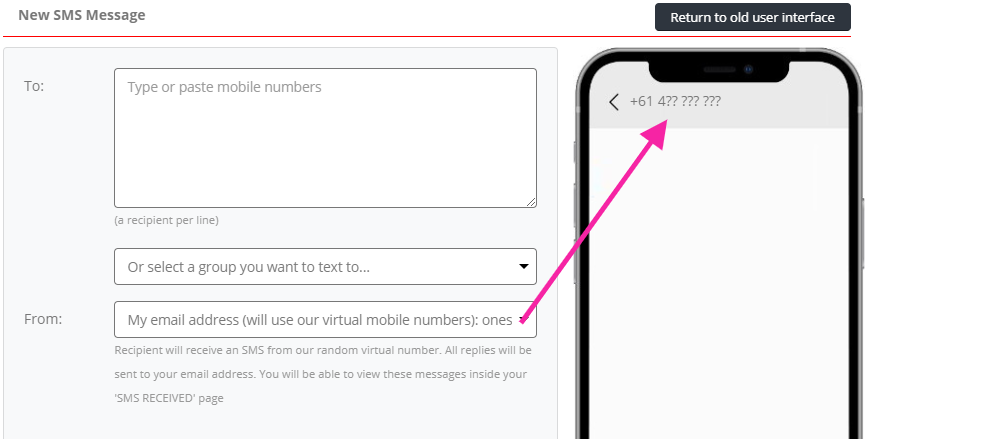
In the above example, you’ll notice that the mobile number is using “?” this means that the recipient will see one of our Virtual Mobile Numbers instead of your own. Secondly, any replies using this option will be sent to your primary email address (located inside your account information) this can be changed to any email you like.
Messaging & Placeholders
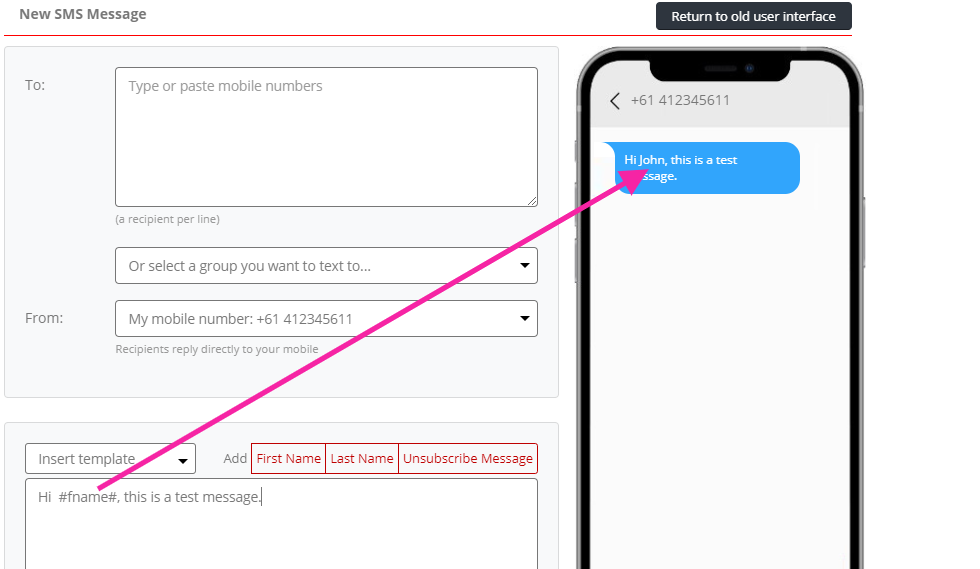
In the below example, you’ll see a standard text message reflecting what you have written inside the message composer.
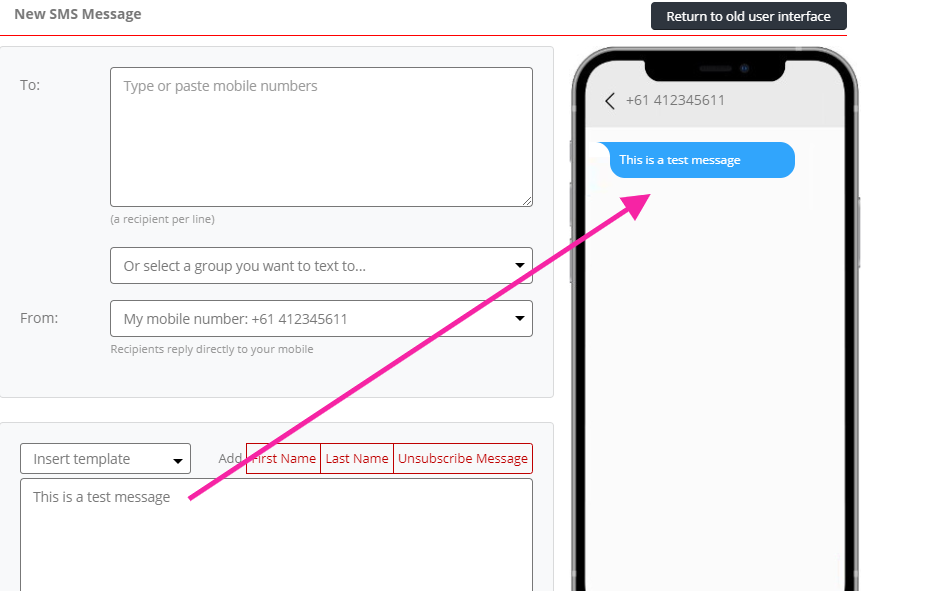
If your contracts group has the first and last names you can add these into your text message by clicking on the “First Name” and/or “Last Name” button.
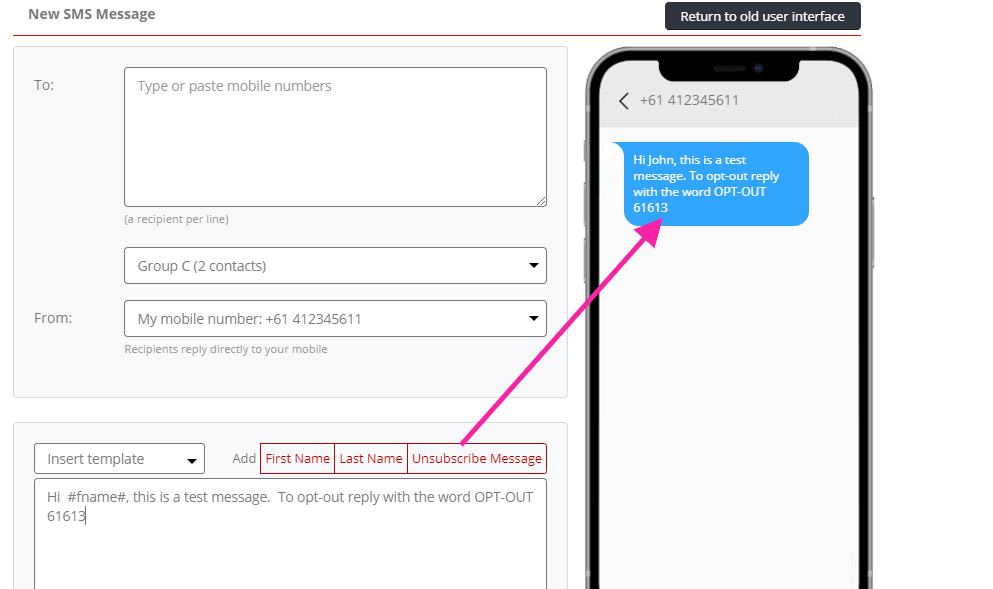
If your have set up your auto opt-out then you can click the unsubscribe button and it will auto-populate an opt-out message. Once people reply with that opt-out code they will be automatically deactivated and will not receive ongoing communications.
If you have not set up an auto opt-out then it will display the words “To opt out reply with the word STOP” when people reply back with the word STOP you will need to manually remove/deactivate them from your list.
Message Compose Section
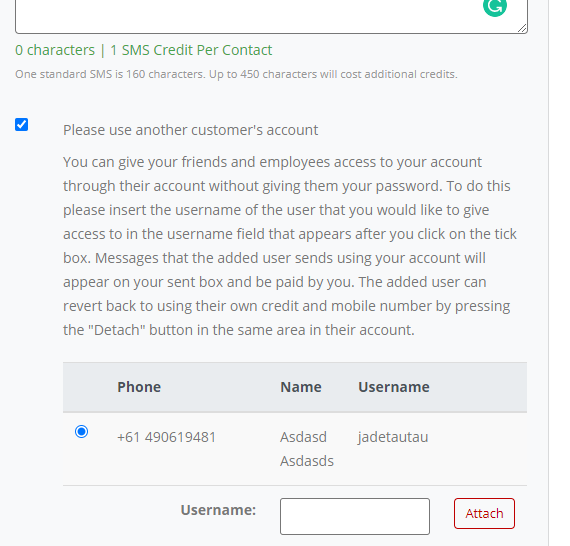
Here you can compose your text message one standard text message is 160 characters (1 SMS credit) as well as use up to 450 characters (4 SMS credits).
We have a character counter and credit calculator that will tell you how many characters you’re using as well as how many credits each text message will cost.
Insert Template, Name Placeholders And Unsubscribe
There are also a few other features you can use:
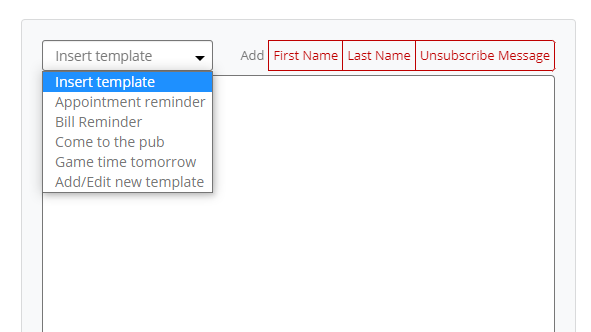
- Insert template – click the drop-down box and select any SMS templates you’ve set up or ‘add/edit’ a new template. You can also add/edit templates by clicking on the “SMS Template” button on the left-hand side menu.
- First Name and Last Name placeholders – By clicking on either of these options will automatically add in the keyword placeholder for the recipient’s name once it has been sent out.
- Unsubscribe – If you click this without setting up an ‘Offers group’ then you will need to manually remove anyone from your list who replies back to you with “STOP”.
A. If you set up an “Offers group” people who opt-out will automatically be deactivated from your list. See our guide on how to set up ‘Offers group’.
B. If you have set up an ‘offers group’ then you can click on the ‘unsubscribe message’ button and it will automatically insert the specific opt-out code based on your ‘Offers group’ settings.
Sub-User Accounts
If you would like to give other people access to your credits without giving them access to your primary account then you can set them up as sub-accounts (they will need to sign up for their own account first). Run a search for their username and click “Attach”.
Delivery Report
If you would like to receive a delivery report then tick this box and check to make sure that the email address is correct. If you do not receive delivery reports it is likely due to your mail servers blocking our domain. In this case, you would need to have our domain www.160.com.au whitelisted.

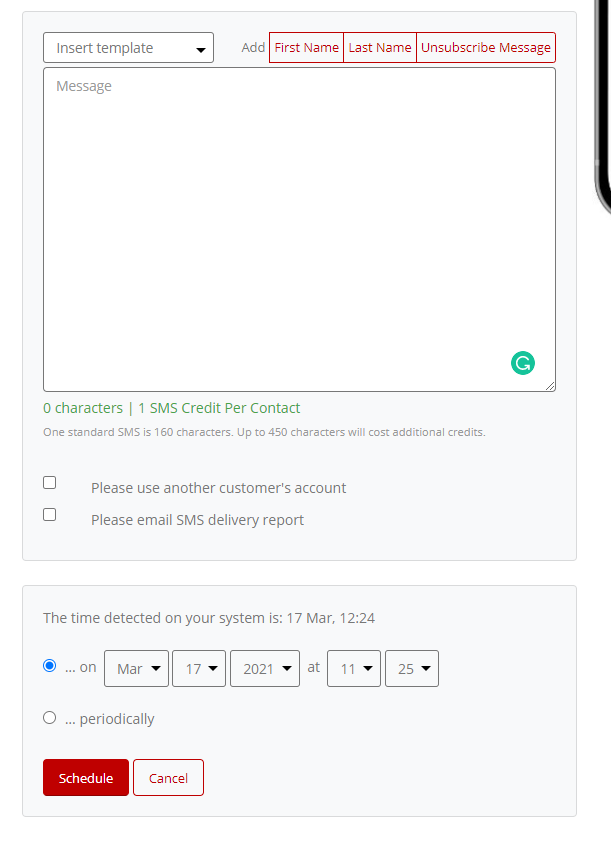
Scheduling
You can also schedule your text messages in two different ways:
- One-Off Scheduling – If you only need to send one message on a specific date/time then the first option is the best.
- Recurring Messages – If you need to send recurring automated messages like payment reminders then the second option “Periodically” is the option you want.